
Tellet (v2)
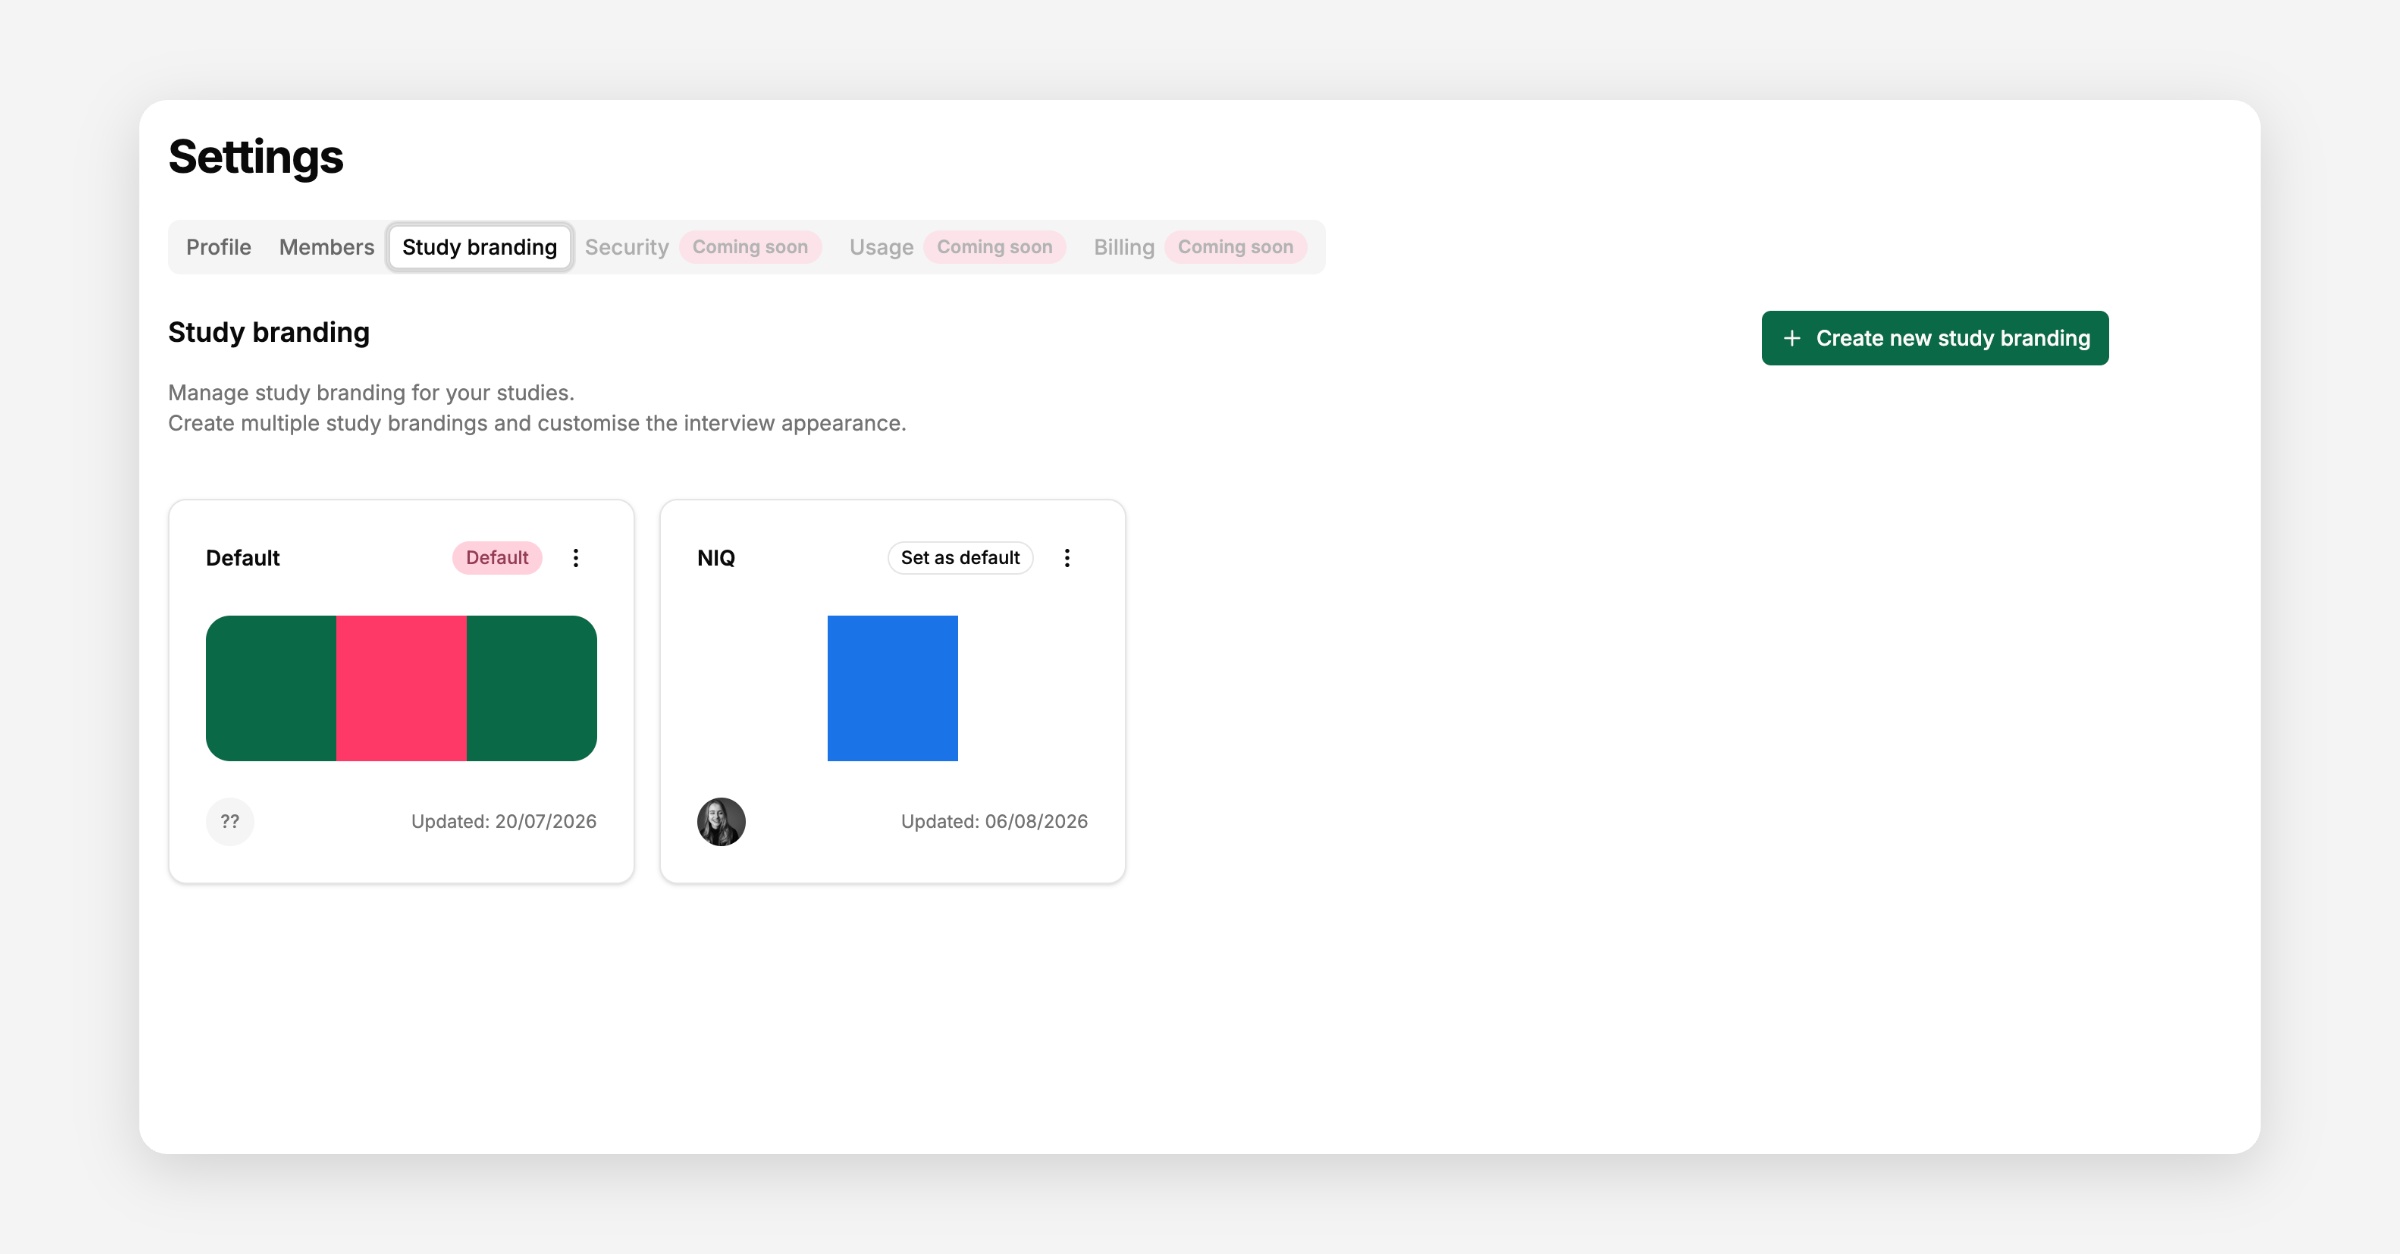
Study branding controls how the interview looks to participants — logo, favicon, and colours. Manage it under Organisational settings → Study branding. Your organisation can have multiple branding profiles, and each study uses one.
Only organisation Owners and Admins can create or edit study branding.
The Study branding tab shows every branding profile in your organisation as a card, with a colour preview and who last updated it.
Select Create new study branding to open the branding editor.
Mark a profile as Set as default so it's the one pre-selected on new studies. Only one profile can be the default at a time — setting a new one automatically un-sets the previous default.
You can delete any profile except the current default. If you need to remove the default, set a different profile as default first. Studies using a deleted profile will lose their branding.
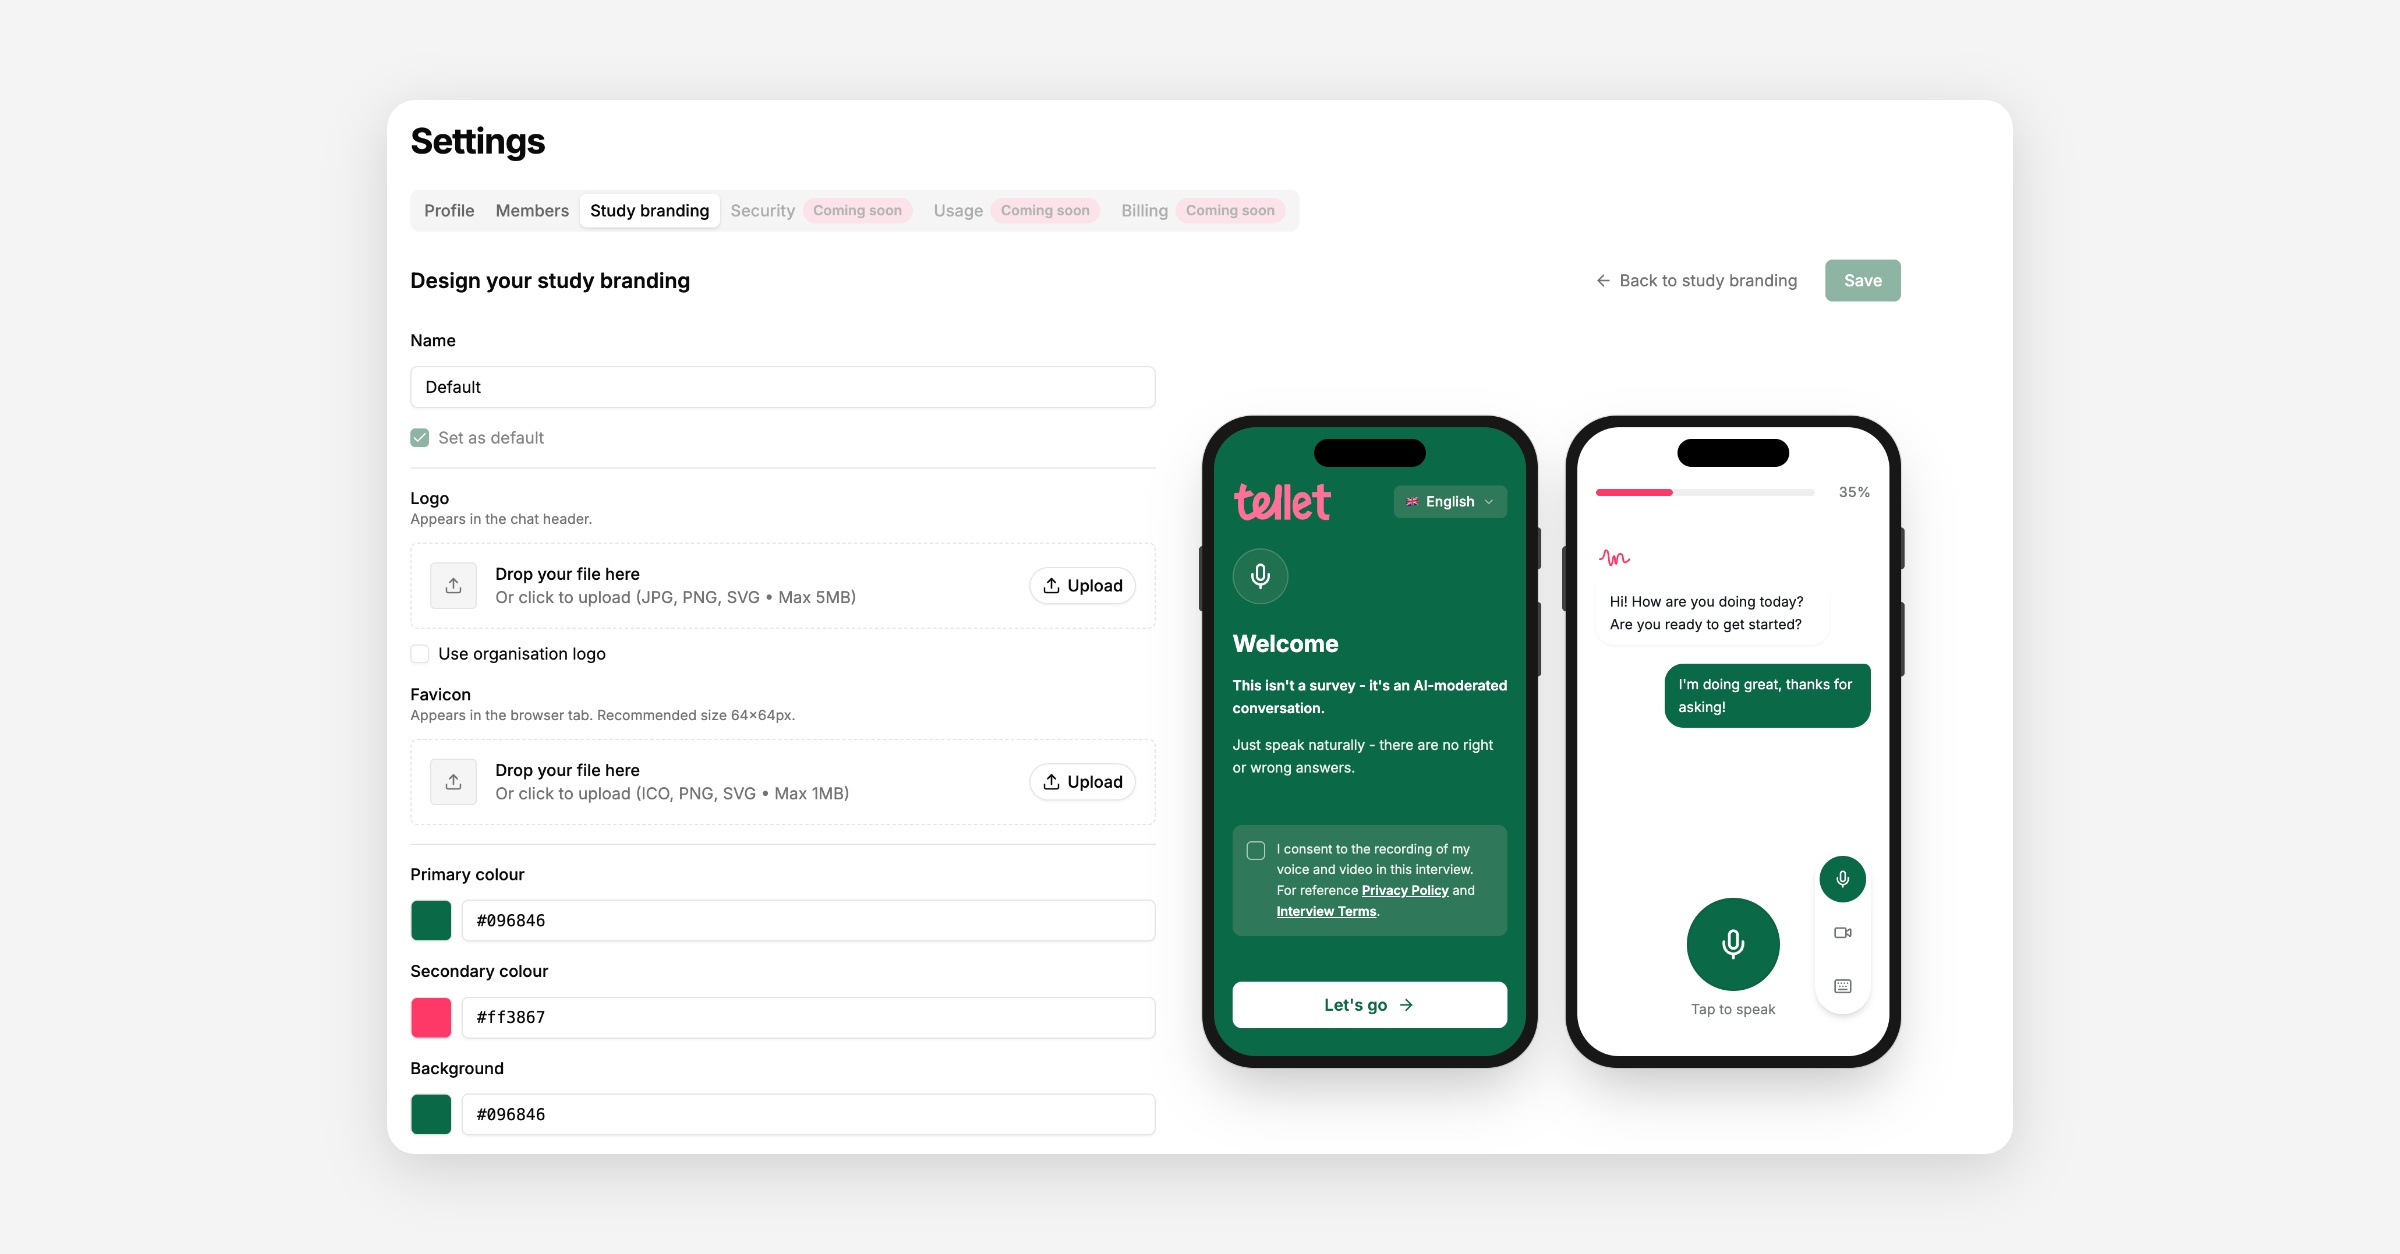
A name to identify this branding profile in the list — this isn't shown to participants.
The logo shown in the interview's chat header. Accepts JPEG, PNG, or SVG.
Turn this on to show your organisation's logo (set in Organisational settings → Profile) instead of uploading a separate one for this branding profile.
The icon shown in the browser tab, recommended at 64×64px. Accepts ICO, PNG, or SVG, up to 1MB.
Set each as a hex colour code. A live preview alongside the form shows how these colours and your logo appear on the participant's consent screen and in the interview itself.
Changes here aren't saved automatically — use the save button once you're happy with how the preview looks.
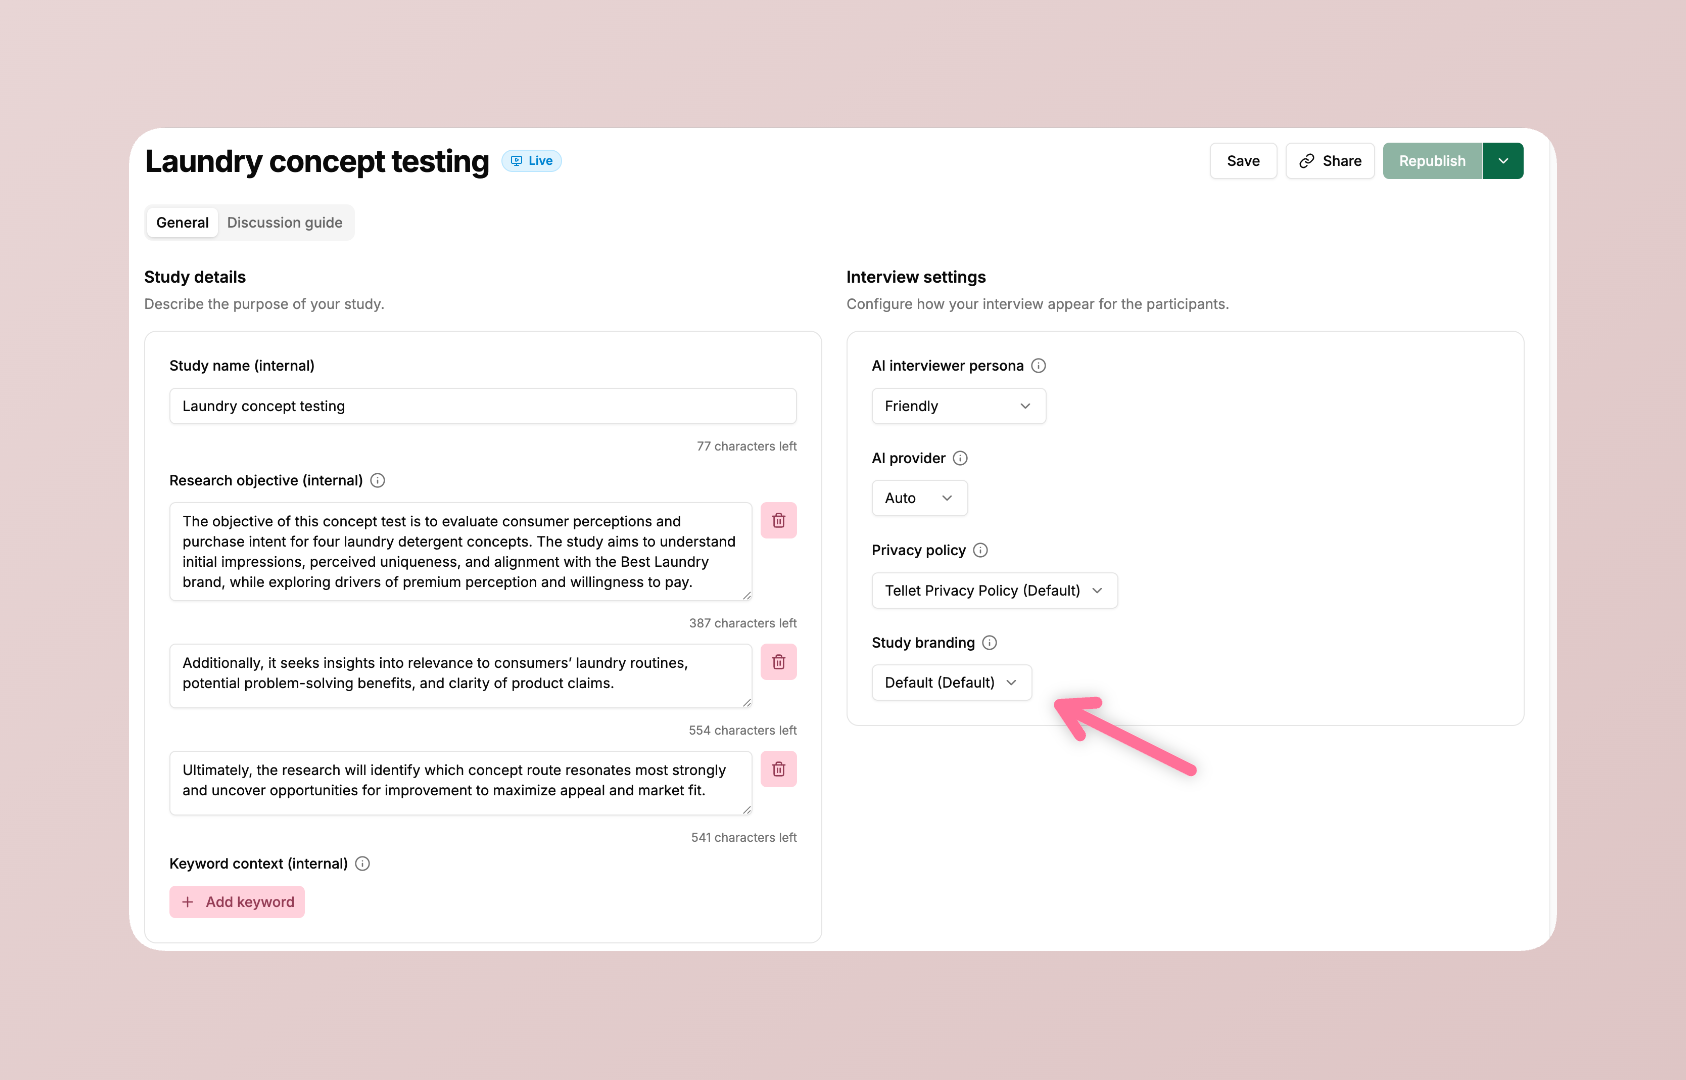
On a study's Design → General tab, the Study branding dropdown lists every profile in your organisation, with "(Default)" next to whichever one is currently the default. A new study starts out pre-selected to your organisation's default branding. From that same dropdown, use Manage study branding to jump back here and add or edit profiles.